

-
llámanos
0086 13559245184 -
Envíanos un correo electrónico
sales@fortunepart.com
llámanos
0086 13559245184Envíanos un correo electrónico
sales@fortunepart.com
Sep, 2026
Your undercarriage represents a major investment in your heavy equipment. Neglect makes it the most vulnerable component to premature failure. Daily cleaning and maintenance are not optional tasks. They form your most effective strategy to prevent rust, identify wear patterns early, and extend vehicle life. A practical routine includes a pre-operation inspection, focused undercarriage cleaning, targeted lubrication, and systematic post-operation assessment. You should pay special attention to the Excavator Track Guard during these checks. Consistency transforms these steps into habits that save thousands in replacement parts and avoid unexpected downtime. These actions also prevent rust from compromising structural integrity.
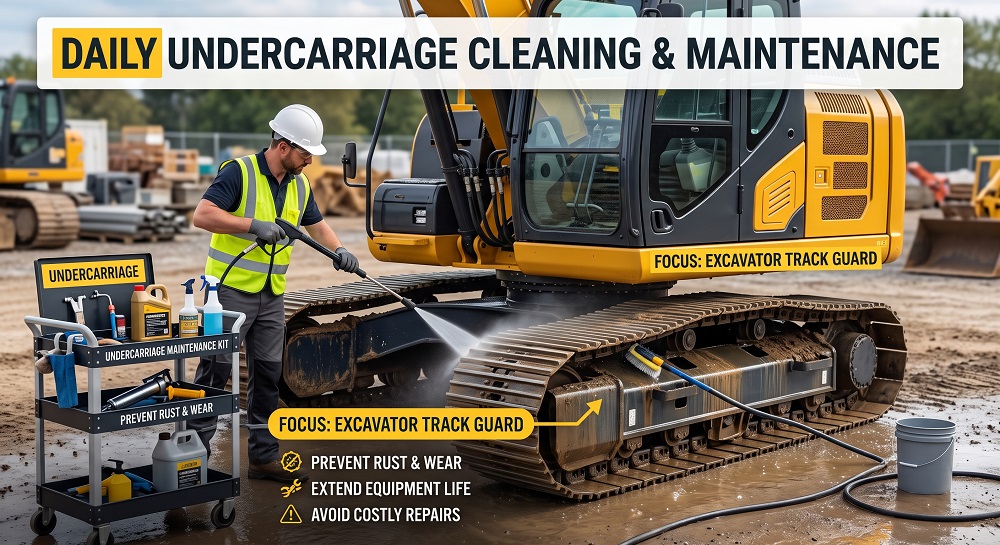
Daily undercarriage care prevents rust and costly repairs.
Inspect tracks, rollers, and guards before starting work.
Clean with a pressure washer and degreaser to remove grime.
Lubricate all grease points after cleaning to protect parts.
Track wear patterns to catch problems early and save money.
Replacing undercarriage components demands a substantial capital outlay. Track chains, sprockets, rollers, and idlers represent some of the most expensive parts on your machine. A single set of track chains can cost tens of thousands of dollars. When you factor in labor charges and downtime losses, the total expense escalates quickly. Daily attention protects this investment. You catch minor wear patterns before they cascade into catastrophic failures. A small crack in a roller today becomes a seized component tomorrow. Your daily inspection identifies these issues while they remain inexpensive to address.
Dirt and moisture create a corrosive environment that attacks metal surfaces relentlessly. Road grime and debris accumulate in the tight spaces between moving parts. This mixture traps water against steel surfaces. The result is electrochemical corrosion that eats away at critical components. You might not see the damage immediately, but it progresses daily beneath the accumulated grime. Regular cleaning removes these corrosive agents before they establish a foothold. You prevent rust from compromising the structural integrity of bushings, pins, and track links. Moisture also washes away protective grease films, leaving bare metal exposed to the elements. Your cleaning routine disrupts this destructive cycle.
A clean undercarriage directly influences your safety on the job site. Excessive mud and debris buildup can cause tracks to bind or throw unexpectedly. This situation creates a serious hazard for you and nearby workers. Proper maintenance ensures that track tension remains consistent and components function as designed. You maintain full control of your machine when the undercarriage operates smoothly. Debris accumulation also hides structural damage. You cannot see cracks or worn components beneath layers of dirt. Daily cleaning reveals these potential failure points. You address them before they cause an accident or equipment malfunction.
Begin your daily routine with a visual inspection of the entire undercarriage. Look for these specific issues:
Fluid leaks around final drives, hydraulic lines, and seals. Even small drips indicate a developing problem.
Loose bolts, nuts, and fasteners on track guards and rollers. Vibration during operation can loosen hardware over time.
Damaged seals with cuts, tears, or signs of wear. A compromised seal lets dirt and moisture enter bearing areas.
A damaged seal allows contamination into bearing areas. This contamination accelerates wear. Catching these issues early reduces repair costs. You identify problems before they cause downtime. Document all findings for your maintenance records. This practice ensures you track recurring issues.
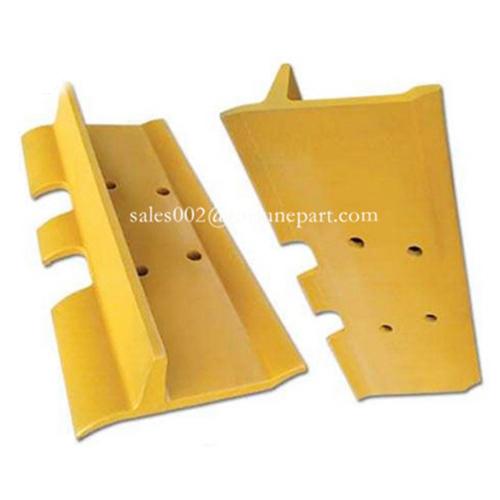
The excavator track guard is a critical area for debris accumulation. Mud, rocks, and plant material pack into this space during operation. This buildup restricts movement and causes premature wear. Inspect the excavator track guard carefully each morning. Remove visible debris with a scraper or pressure washer. Pay special attention to packed material between the track and guard. This trapped debris causes friction and accelerates component wear. You reduce this risk through daily cleaning. Consistent cleaning also helps you prevent rust from forming on exposed metal surfaces. Rust weakens structural components over time.
Proper track tension ensures optimal undercarriage performance and extends component life. Check tension by measuring sag between the front idler and top carrier roller. Follow manufacturer specifications for your specific machine model. Misalignment causes uneven wear on tracks, rollers, and sprockets. Look for signs of rubbing or unusual contact patterns on the track chain. Adjust tension as needed using the grease fitting or tensioner. Consistent inspections catch alignment issues early. You address them before they damage expensive components. This check also prevents track throw events.
Effective undercarriage cleaning requires a systematic approach that removes corrosive agents without damaging sensitive components. You need the right tools, proper chemical application, and a targeted strategy for high-wear areas. This process transforms a routine chore into a precision maintenance task that protects your investment.
Your tool selection determines the quality of your undercarriage cleaning results. A pressure washer with a minimum of 3,000 PSI provides the force needed to dislodge packed mud and grime. Choose a nozzle with a wide fan pattern to distribute pressure evenly across surfaces. A narrow jet concentrates force and can damage seals or force water into bearing cavities. You should also keep a set of scrapers with different blade widths. Flat scrapers remove large deposits of clay or compacted soil. Hook-shaped scrapers reach into tight spaces around sprockets and idlers. Stiff-bristled brushes complement your pressure washer for areas that need manual agitation. Use brass or nylon brushes on machined surfaces to avoid scratching. Steel brushes work well on heavy crust but require careful handling near seals.
A portable grease gun with a flexible hose extends your reach into confined areas. You also need a bucket of clean water and rags for final wipe-downs. Organize these tools on a dedicated cart or tray. This arrangement keeps everything accessible and prevents tools from becoming contaminated with grease. Your cleaning station should include a containment mat or drain system to capture runoff. Environmental regulations often require proper disposal of wash water containing degreasers and petroleum residue.
Water alone rarely removes the thick grease and oil deposits that accumulate on undercarriage components. You need a chemical degreaser to break down these stubborn contaminants. Select a biodegradable degreaser that is safe for both your equipment and the environment. Apply the degreaser evenly using a low-pressure sprayer or brush. Focus on areas with visible grease buildup, such as final drive housings and pivot points. Allow the chemical to penetrate the grime layer before you begin rinsing.
For heavy undercarriage grease deposits, the recommended dwell time is3 to 5 minutes. This window is critical; the chemical must remain active without drying. If the surface dries, the emulsified grease re-bonds to the substrate, often becoming harder to remove than the original contaminant. This specific timeframe allows for complete molecular breakdown of the accumulated grime layer.
You should monitor the degreaser during this dwell period. If you notice the surface drying, apply a light mist of water to keep the chemical active. Do not let the degreaser sit longer than five minutes on aluminum or painted surfaces. Extended contact can cause discoloration or surface degradation. After the dwell time expires, rinse thoroughly with your pressure washer. Work from the top down to prevent dirty water from running over already-cleaned areas. This rinsing direction ensures you remove dissolved contaminants rather than redistributing them.
Your undercarriage cleaning routine must prioritize specific components that experience the highest stress and wear. The track chain requires special attention because it carries the entire machine weight. Spray along both sides of the chain to dislodge debris from between links and bushings. Rotate the track slightly to expose fresh surfaces for cleaning. You can achieve this rotation by moving the machine forward or backward a few feet during the process.
The excavator track guard demands focused effort during every cleaning session. This component protects the track system from debris intrusion, yet it also traps material against moving parts. Use your scraper to remove packed soil from the gap between the guard and the track chain. Follow with a directed spray from your pressure washer to flush remaining particles. Pay attention to the mounting bolts on the excavator track guard. Accumulated grime hides loose hardware and corrosion. Clean these areas thoroughly so you can inspect fastener condition during your post-operation check.
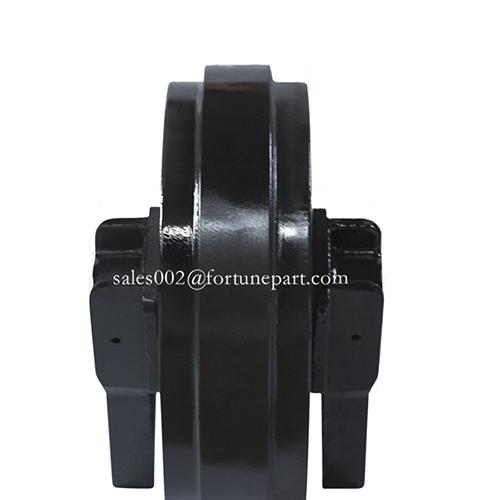
Rollers and idlers rotate constantly during operation, making them prime candidates for premature wear. Clean the contact surfaces where the track chain rides across these components. Remove any built-up material that could cause uneven pressure distribution. Inspect the end faces of rollers for signs of seal leakage. A clean surface reveals oil seepage that would otherwise go unnoticed beneath layers of dirt. Sprockets require careful cleaning because their teeth engage directly with the track bushings. Use a brush to dislodge packed material from between the teeth. A pressure washer alone often fails to remove this compacted debris. Follow with a thorough rinse to ensure no abrasive particles remain to accelerate wear.
Your cleaning process should also address the area around the final drive motor. This component houses critical gears and bearings that rely on clean operating conditions. Remove any accumulated grease and dirt from the drive sprocket mounting area. This practice prevents contamination from entering the final drive seals. Regular attention to these high-risk zones reduces the frequency of major component replacements. You also prevent rust from forming on exposed metal surfaces that remain damp after cleaning. A final air blow-down with a compressor removes standing water from crevices and bolt holes. This step accelerates drying and minimizes corrosion risk.
Consistent undercarriage cleaning prevents rust from establishing a foothold on critical components. You create a clean surface that allows accurate inspection during your post-operation assessment. This routine also supports your broader maintenance schedule by revealing developing issues early. Remember that car undercarriage cleaning principles apply equally to heavy equipment. The same corrosive forces affect both types of vehicles, though the scale of damage differs significantly. Your diligence in this daily task directly translates to reduced repair costs and extended component life.
Rinsing demands the same precision as the degreasing step. You must eliminate all chemical residue and loose debris from every surface. Incomplete rinsing leaves degreaser film behind. This film attracts dirt and accelerates corrosion over time. Start at the highest point of the undercarriage and work downward. This direction prevents dirty water from running over already-clean areas. Use a wide fan spray pattern to distribute water evenly across components. A concentrated jet forces moisture into bearing cavities and seal gaps. Effective cleaning requires thorough rinsing to achieve the desired results.
Focus on the excavator track guard during your final rinse. This component traps water against the track chain and mounting hardware. Direct your spray into the gap between the guard and the track. Rotate the track several feet to expose fresh surfaces. Continue rinsing until the runoff water runs completely clear. Any remaining soap film indicates incomplete removal.
Drying completes the undercarriage cleaning process. Standing water in crevices and bolt holes creates a perfect environment for corrosion. You have several options for effective drying. Compressed air from a blow gun reaches into tight spaces around rollers and idlers. A clean rag or shop towel wipes exposed surfaces. Moving the machine a short distance shakes water from recessed areas. Allow the machine to sit for a few minutes before your post-operation inspection. This pause lets residual moisture evaporate. This cleaning method also prevents residue buildup on sensitive components.
Moisture trapping poses a significant threat to component longevity. Water trapped between the track chain and bushings washes away protective grease films. This condition accelerates wear on the bushing inner diameter. The same principle applies to car undercarriage cleaning, where trapped moisture causes rust on exposed metal surfaces. Your thorough drying routine helps prevent rust from forming on critical components.
A dry undercarriage also allows accurate inspection. You can see hairline cracks, seal condition, and fastener tightness without moisture interference. This visibility supports your broader maintenance schedule. You identify issues before they require major repairs. The few extra minutes spent on drying directly reduce future downtime.
Lubrication stands as the final step in your post-cleaning routine. This process protects the freshly exposed metal surfaces from corrosion and ensures smooth operation of moving components. You must understand exactly where grease belongs, how frequently each point requires attention, and what signs indicate you have applied too much or too little. Proper lubrication completes the cycle that your undercarriage cleaning begins.
Every heavy machine has specific lubrication points that require your attention. Consult your operator's manual to locate all grease fittings on your particular model. The primary areas typically include track adjusters, carrier roller brackets, idler mounts, and pivot points on the boom and arm. Each fitting accepts grease through a standard zerk or pin-type coupler. You should familiarize yourself with these locations before you begin any lubrication task.
Track adjusters require special attention because they control track tension. These fittings sit near the front idler on most excavators. You apply grease to increase tension and release grease to decrease it. The excavator track guard area often contains additional fittings that protect the track system from debris intrusion. Clean each fitting thoroughly before attaching your grease gun. A dirty fitting pushes contaminants directly into the bearing cavity. Wipe the fitting with a clean rag and apply a small amount of grease to purge any debris from the tip.
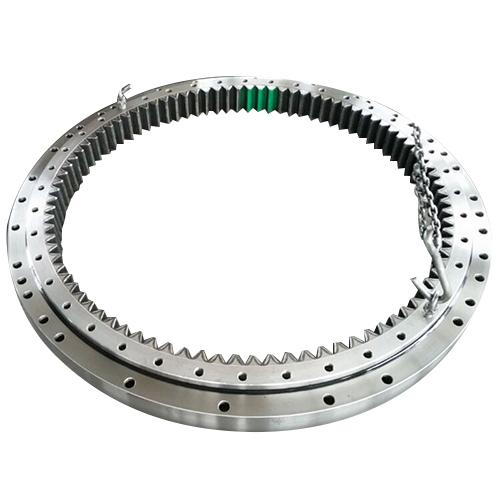
Carrier roller brackets and idler mounts typically have one fitting each. These components support the track chain as it travels across the top of the undercarriage frame. The pivot points on your boom, arm, and bucket linkage also require regular greasing. These areas experience high stress during digging operations. You should also check for fittings on the swing bearing and final drive mounting areas. Your operator's manual provides a complete diagram of all lubrication points. Keep this reference accessible in the cab for quick consultation.
Your lubrication schedule depends on operating conditions and manufacturer recommendations. Daily greasing applies to components that experience constant movement and high loads. These include bucket pivot points, boom foot pins, and arm cylinder rod ends. You should grease these fittings every morning before you begin operations. This practice ensures a fresh protective film on bearing surfaces. It also forces out any contaminants that entered during the previous day's work.
Weekly lubrication applies to components that rotate less frequently or operate under lighter loads. Carrier roller brackets, idler mounts, and track adjusters fall into this category. You can schedule these greasing tasks for a specific day each week. Consistency matters more than the exact day you choose. Pick a day that aligns with your other maintenance activities. Many operators combine weekly greasing with their equipment washing routine. This approach ensures you never skip this critical step.
Your operating environment influences the frequency of lubrication. Machines working in dusty or sandy conditions require more frequent greasing. Abrasive particles penetrate grease films quickly and accelerate wear. Machines operating in wet conditions also need additional attention. Water washes away protective grease and leaves metal surfaces exposed to corrosion. Adjust your schedule based on the conditions you encounter. A machine working in severe conditions may need daily greasing of all points, not just the high-wear areas.
You must develop the ability to read the visual cues that indicate lubrication problems. These signs tell you whether you have applied the correct amount of grease or if you need to adjust your technique. Over-lubrication causes as much damage as insufficient greasing. You need to recognize both conditions before they lead to component failure.
Excessive oil or grease leakage around the seals indicates over-greasing or seal failure. You force grease past the seal when you apply too much pressure. This leakage creates a mess and attracts dirt to the area.
Discoloration of lubricant shows oxidation, contamination, or loss of protective properties. Dark, murky oil or hardened, crusty grease signals that the lubricant has broken down. Fresh grease appears clean and consistent in color.
Dry residue around a fitting confirms advanced lubrication failure. This condition often results from over-lubrication that damaged the seal. Once the seal fails, contaminants enter the bearing cavity freely.
Over-lubrication accelerates failure and can lead to overheating. When you pack too much grease into a bearing cavity, you restrict the movement of internal components. The excess grease creates pressure that forces seals outward. This pressure damages the seal lip and allows contamination to enter. Contaminated grease spreads abrasive particles across bearing surfaces. These particles directly damage seals and bearings through a grinding action. You must apply grease slowly and watch for resistance on the grease gun handle. Stop when you feel back pressure or when a small amount of grease appears at the seal edge.
Insufficient greasing presents different visual signs. You might notice squeaking or grinding noises during operation. These sounds indicate metal-to-metal contact between moving parts. You might also see rust forming on exposed pins and bushings. This condition occurs when the protective grease film wears away completely. Regular lubrication prevents rust from developing on these critical surfaces. You should also check for excessive play in pivot points. Loose joints indicate worn bushings that resulted from inadequate lubrication.
Your daily maintenance routine should include a quick visual check of all grease points. Look for fresh grease around seals, which indicates proper lubrication. Check for signs of leakage or contamination that suggest problems. This inspection takes only a few minutes but provides valuable information about your equipment's condition. You catch developing issues before they require expensive repairs. You also maintain the protective barrier that keeps moisture away from metal surfaces. This barrier is your first defense against corrosion and premature wear.
Your post-operation inspection transforms daily cleaning into a predictive maintenance tool. This systematic review catches developing problems before they escalate into costly failures. You examine critical components with fresh eyes, now that your cleaning has removed the grime that hides defects.
You must train yourself to recognize the visual language of undercarriage wear. Several indicators signal that components are approaching the end of their service life. Pointy sprocket teeth, for instance, indicate advanced wear that compromises track engagement. Scalloped idlers reveal improper track tension or worn internal components. Flattened rollers suggest excessive impact absorption. Loose, bent, or missing track pads create instability across the entire system. Oil leaks from seals confirm contamination has entered bearing cavities. Track pitch elongation, the increased distance between pins and bushings, causes poor sprocket meshing and rapid wear.
|
Indicator |
What It Signals |
|---|---|
|
Pointy sprocket teeth |
Advanced wear, poor track engagement |
|
Scalloped idlers |
Improper tension or worn components |
|
Flattened rollers |
Excessive impact or friction absorption |
|
Loose, bent, or missing track pads |
Instability, accelerated surrounding wear |
|
Oil leaks from seals |
Seal failure, contaminant entry |
|
Track pitch elongation |
Poor sprocket meshing, rapid component wear |
You also inspect for hairline cracks on structural components and elongated bolt holes that indicate fastener stress. These defects often remain invisible beneath accumulated dirt. Your thorough cleaning makes them visible for accurate assessment.
You record every observation in a structured log, whether paper-based or digital. This documentation creates a historical record that reveals wear patterns across operating hours. Digital inspection systems reduce undercarriage replacement costs by 40–60 percent through predictive maintenance. Automated scheduling and trend analysis enable early problem detection. You eliminate unexpected failures because you anticipate component replacement intervals.
Critical measurements follow a fixed cadence. You perform detailed sprocket and idler inspections every 100 operating hours. This frequency establishes a reliable measurement rhythm. You compare current readings against previous entries to calculate wear rates. A component wearing faster than expected signals an underlying issue, such as misalignment or contamination. Your documentation catches these anomalies early.
You classify each finding based on severity and operational risk. Immediate repairs address safety hazards, active leaks, or components at imminent failure risk. Scheduled maintenance handles developing wear that does not threaten immediate operation. Track pitch elongation beyond 2 percent demands immediate action. At this threshold, you replace the entire track group, including sprockets and often idlers, for coordinated performance.
Statistics support the value of systematic inspections. Reactive repairs cost three to five times more than preventive maintenance. Systematic programs reduce maintenance costs by 23 percent and unplanned downtime by 40 percent. You prevent rust from forming when you address seal leaks promptly. Moisture entering through failed seals corrodes internal components. Your daily inspections catch these issues while they remain inexpensive to correct. This disciplined approach to undercarriage maintenance extends component life and protects your equipment investment.
Daily undercarriage care delivers a straightforward, repeatable process that protects your equipment investment. You combine pre-operation checks, thorough cleaning, and proper lubrication to prevent rust and catch minor issues before they escalate. Make this maintenance routine non-negotiable in your daily operations. It ensures safety, reliability, and extended equipment lifespan. The few minutes you invest today seem insignificant compared to the downtime and repair costs of a breakdown tomorrow. Your diligence determines your machine's longevity.
You should perform a full undercarriage cleaning after every 8 to 10 hours of operation. This schedule aligns with a standard workday. Machines working in wet, muddy, or dusty environments require more frequent attention. You might need multiple cleaning sessions daily under severe conditions. Consistency protects your components from corrosive buildup.
You need a pressure washer with at least 3,000 PSI for effective results. Standard residential units lack sufficient force to remove packed mud and grime. Use a wide fan nozzle to protect seals from concentrated water pressure. A narrow jet can force moisture into bearing cavities and cause damage.
Operators often skip the drying step after rinsing. Standing water in crevices and bolt holes creates a corrosion environment. You must use compressed air or allow adequate air-drying time before lubrication. This practice prevents rust from forming on freshly cleaned metal surfaces. Your diligence here extends component life significantly.
You measure track sag between the front idler and top carrier roller. Compare your measurement against manufacturer specifications for your machine model. Excessive sag indicates loose tension that can cause track throw. Tight tension accelerates wear on bushings and sprockets. Check tension daily before starting operations for optimal performance.
Yes, you should apply grease immediately after the undercarriage dries completely. Fresh grease displaces any remaining moisture and creates a protective barrier. This practice prevents corrosion on exposed pins and bushings. Follow your manufacturer's lubrication chart for specific intervals and grease points. Daily greasing of high-wear components remains essential.
etiquetas :
categorías
reciente publicaciones
etiquetas
Xiamen Fortune Industrial Co., Ltd.
Room 402,No.7,Kangleli,Huli District, Xiamen, Fujian, China
Tel : 0086 13559245184
Fax : 0086-592-7072790
Whatsapp/Wechat : +8613559245184
Contact Person: James Xie
Correo electrónico: sales@fortunepart.com
Microsoft Teams: part-sales
escanear a wechat: